Connect a robot
Choose the correct model and connect virtually, over USB, Bluetooth or a remote session.
Open connection settings
Select Not connected in the sidebar or Connect robot in an exercise. Choose a saved robot or the model matching your arm. Do not reuse calibration from a similar but different robot.
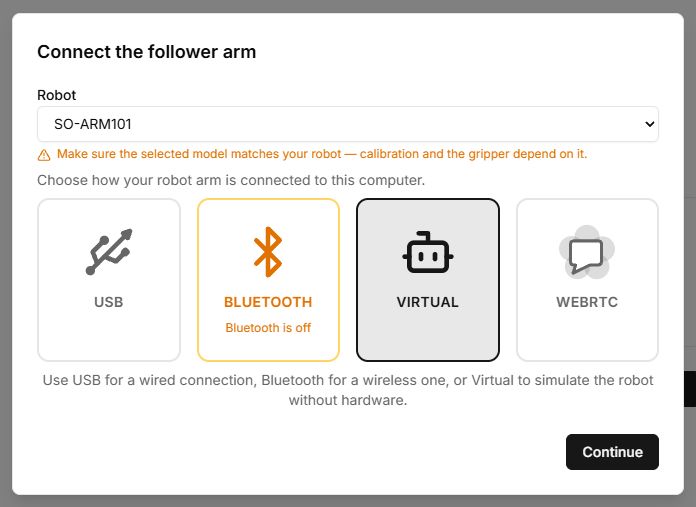
Virtual robot
- Select Virtual and continue.
- Check that Lab reports a virtual connection. Exercises may display a floating joint panel.
- Check movement in 3D. Free-movement sliders and program control are different modes; enabled holding torque may prevent manual movement.
USB
- Secure the arm, check wiring and the correct power supply, then connect the board with a data USB cable.
- Choose USB and Continue. Select the board’s port in the browser dialog and grant access.
- Wait for the device scan. Read the individual motor rows, not just the port status.
- Resolve incorrect IDs and other messages before continuing. Support the arm when torque is released because it may drop.
| Status | Next step |
|---|---|
| OK | The device responded; calibration accuracy has not yet been checked. |
| Not connected | Check power, wiring and the missing device’s ID. |
| Not configured | Check ID assignment using Set motor IDs. |
| Sensor | A sensor was found; do not count it as one of the six motors. |
Bluetooth
Choose Bluetooth and select the device in the browser dialog. You need Web Bluetooth support, an enabled adapter, permissions and compatible firmware. A computer having Bluetooth does not guarantee board compatibility.
Remote physical arm
The owner opens a robot in My robots and starts Allow remote control. The operator selects WebRTC and enters the owner’s code. Someone beside the arm must supervise physical safety throughout the session. Finish with Stop session. Some service tools require a direct connection. This is separate from Presentation for showing a model.
Controls
| Button or field | Action and result |
|---|---|
| Not connected / Connect robot | Opens the wizard. Its heading identifies the role: follower or leader arm. Check this before selecting a device. |
| Robot / Robot model | Select a saved profile or model. Selecting only a model is insufficient for tools that require a saved profile. |
| USB / Bluetooth / Virtual / WebRTC | Choose the transport. Unavailable methods are marked unsupported; use Virtual for your first session. |
| Continue on transport selection | Starts connecting. For USB and Bluetooth, the browser separately asks you to select a device. The button is unavailable until a required transport or profile is selected. |
| WebRTC → code | Enter the owner’s six-character remote-session code. This mode requires sign-in; a presentation code is not valid here. |
| ID / Via / Value / Status table | Shows polling results. Check that the required motors appear and read every row’s messages. OK means the device responded, not that the mechanism was checked. |
| Back | Returns to model and transport selection. Use if you selected the wrong arm or profile. |
| Retry | Repeats connection and polling. Use after resolving a power, cable or ID problem. |
| Control from phone | When enabled, shows a QR code for phone control after connecting. This is an additional mode; it is not required for normal slider control. |
| Continue after polling | Completes the wizard and opens the workspace. Read setup messages before continuing. |
| Connected → disconnect | Open the connection menu and confirm disconnection of the intended arm. Support a physical arm when torque is released; browser disconnection does not replace turning off power according to the kit instructions. |