
How a lesson works
The screen
A lesson takes over the window. There are two panes.
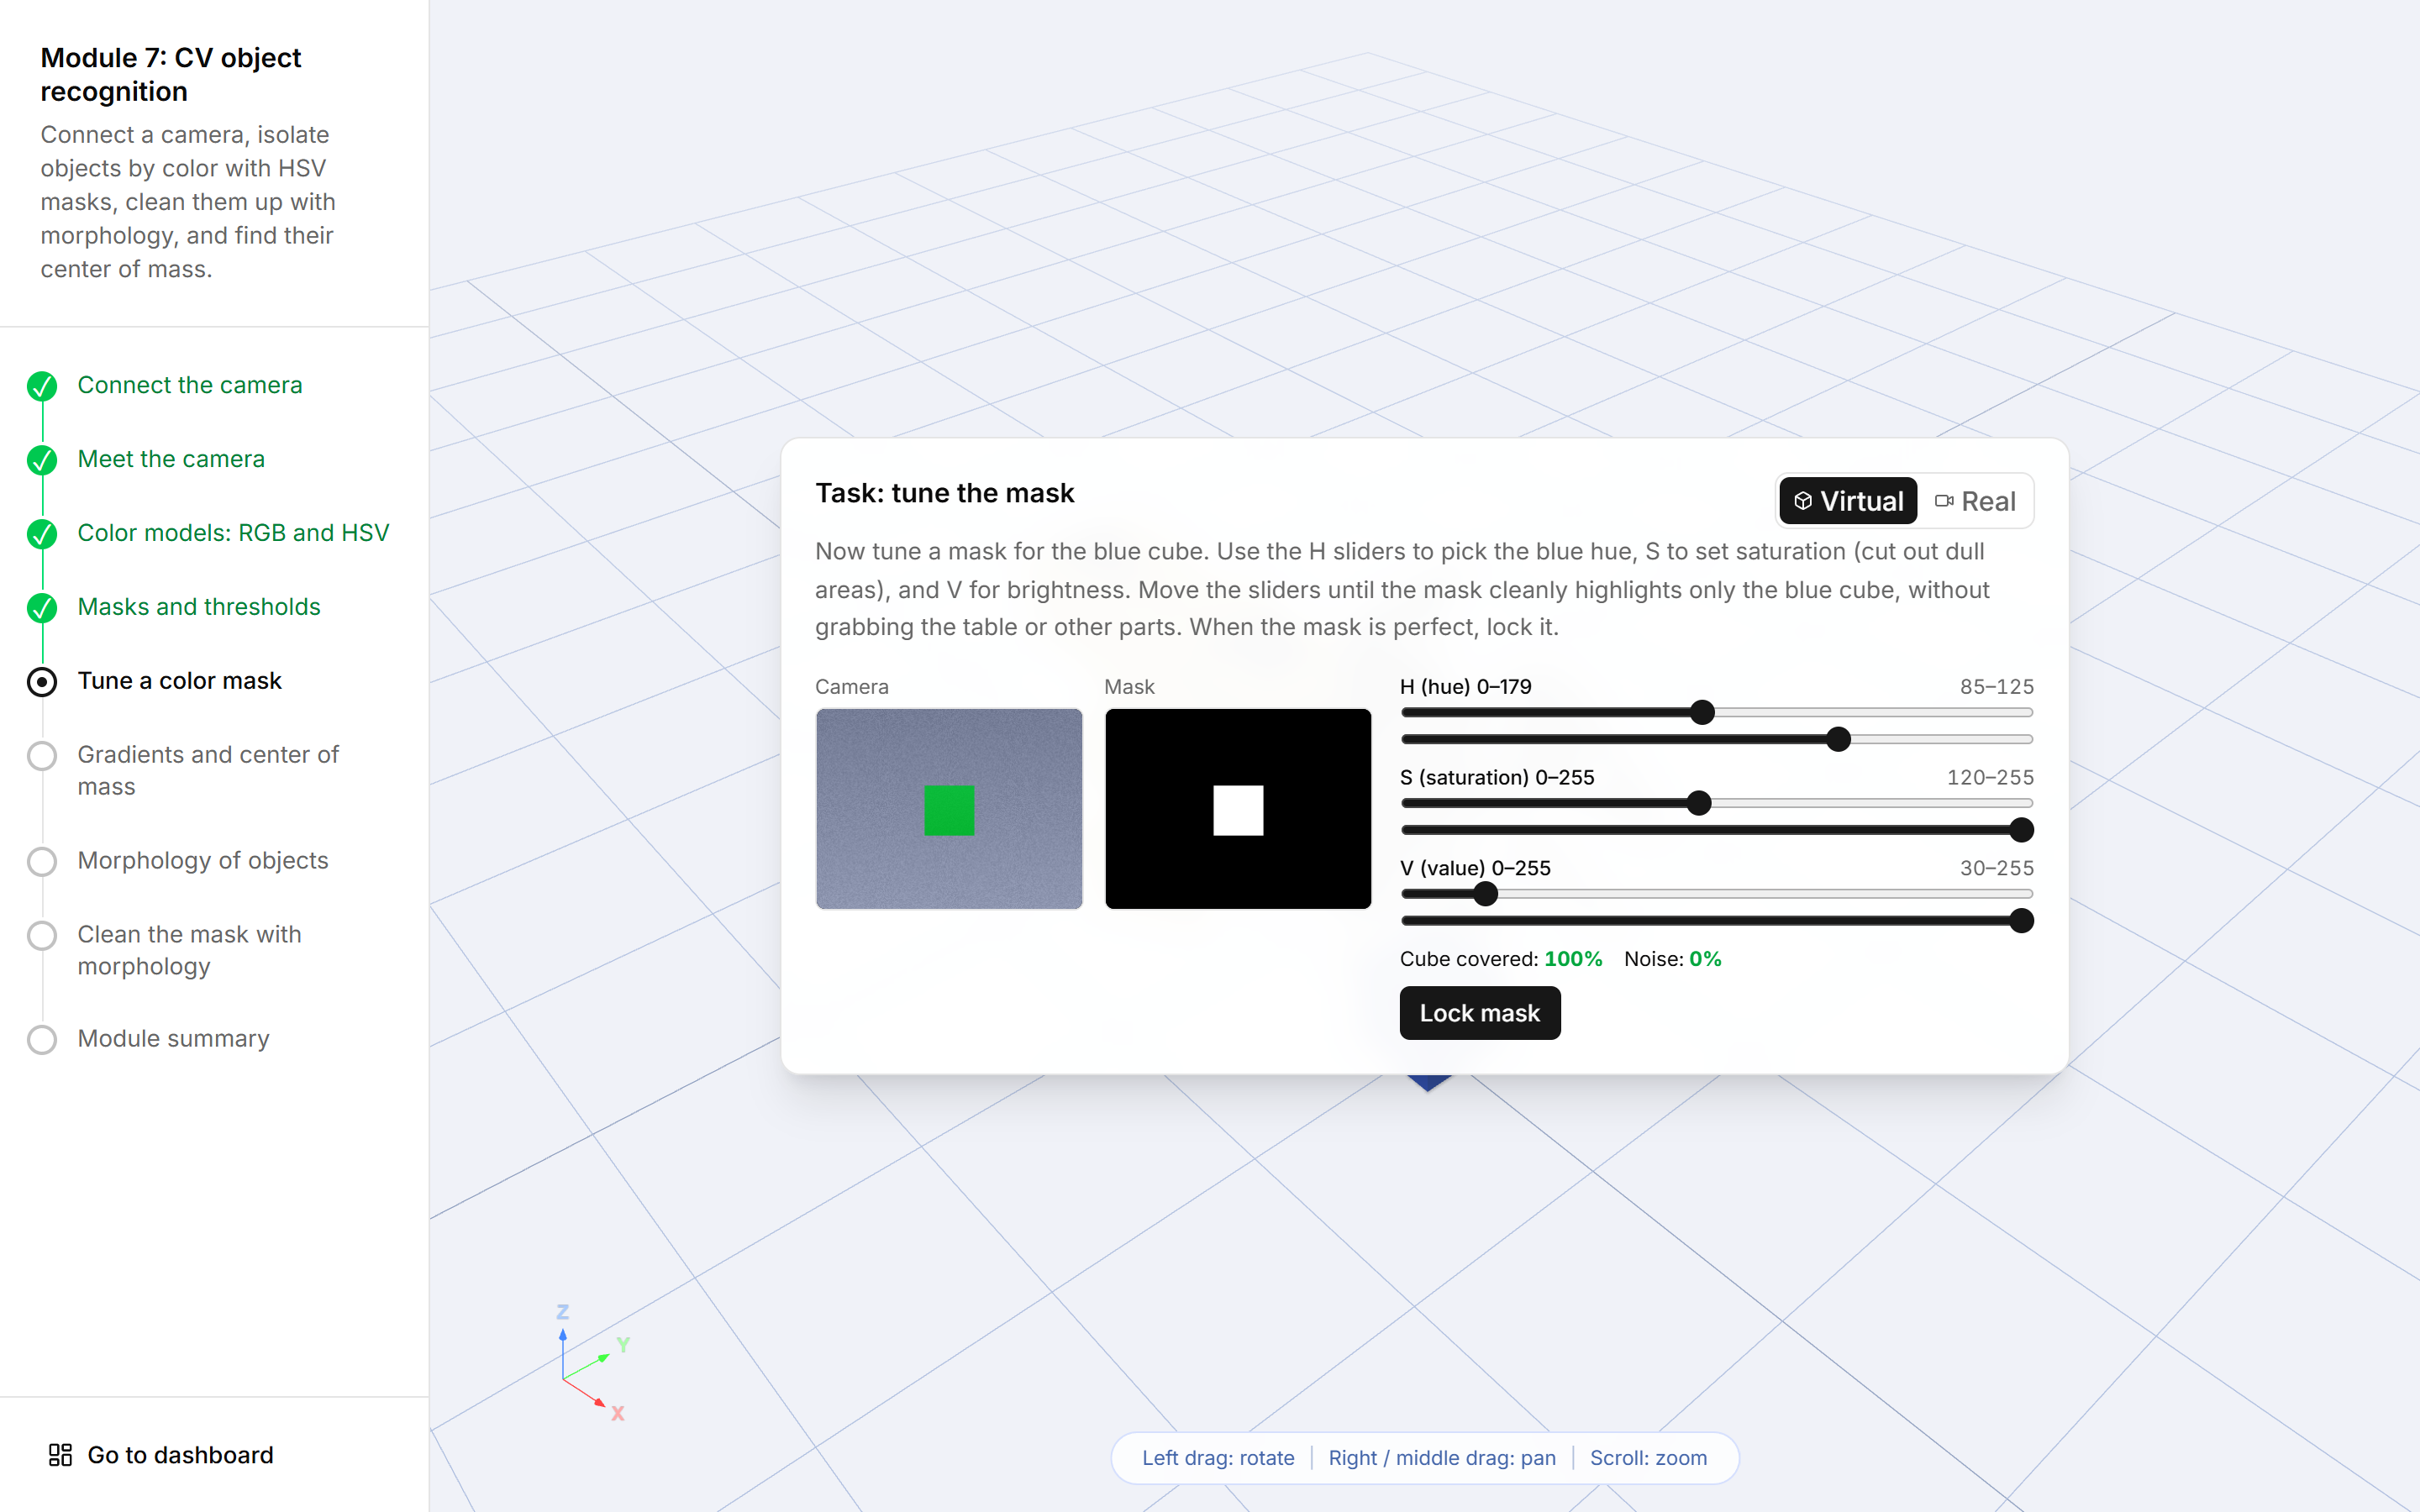
On the left, the step rail. The module's number and name, its description, and a vertical list of numbered steps. A finished step has a green circle with a tick; the one you are on has a ring; the rest are grey. You can click back to any step you have finished — useful for re-reading a table — but not forward past the one you are on.
At the bottom, Go to dashboard. It asks first: Leave this lesson? You will be taken back to the dashboard.
On a narrow screen the rail collapses into a header you can tap open.
On the right, one step at a time. Text, illustrations, video, tables, expandable sections, the 3D viewport, or a task to perform. One step is one idea.
How a step is passed
Most steps are passed by doing the thing, not by answering a question. The module watches the arm and the simulator, and decides.
- Hit an angle within tolerance.
- Reach a point without a collision.
- Grip within the correct force band.
- Tune a mask until only the target object survives.
- Label sixty images well enough.
When an attempt fails, the lesson usually shows a Problem / Possible cause / Solution table rather than just "try again" — Modules 3, 4, 5, 6, 8 and 9 all have them.
Multiple-choice checkpoints exist only in Module 0, on the safety topics. They shuffle the options, and a wrong answer explains itself before letting you retry.
The 3D viewport
Present from Module 2 onwards. It renders the arm from its URDF model and follows the real machine's encoders.
| Gesture | Result |
|---|---|
| Left-drag | Rotate the view |
| Right-drag or middle-drag | Pan |
| Scroll | Zoom |
| Click a motor | Live motor readout — value, range, speed and acceleration limits, temperature |
| Click a highlighted part (Module 2) | Its name |
While the model loads you will see Loading 3D model — n of m files. On a slow machine the first load of a module takes a few seconds.
What is not in the lessons
There is no code editor and no block-coding canvas. Module 6's "programming" is done by building a list of motions with Add PTP, Add LIN and Add CIRC buttons. If you want to drive the arm from your own code, that lives in the tools and the plugin SDK rather than in the course.
Progress, and how it is kept
Every step you finish is recorded against your account on the server, and mirrored into the browser so the lesson opens instantly and survives a dropped connection.
Two consequences worth knowing:
- You can change computer. Sign in elsewhere and you are where you left off.
- Progress is a run, not a set of ticks. Only an unbroken sequence from the first step counts, so a reordered module can never leave you with orphaned ticks in the middle.
The address bar carries the step, so you can bookmark or share a link to a particular step of a module — it opens there if you have got that far.
Finishing the last step marks the module complete and returns you to the dashboard, where the next card unlocks.
