Control robot
Explore forward and inverse kinematics and read node coordinates.
Start
- Connect a robot; use Virtual for your first exploration.
- Open Control robot. Before confirming a movement warning, verify the expected connection.
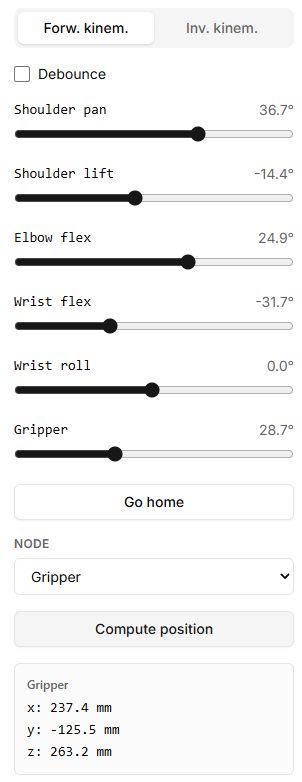
- In Forw. kinem., change one slider by a small amount and check which joint moves.
- Choose a Node and select Compute position to display its coordinates in millimetres.
- Go home returns the model to its neutral pose. With physical hardware, this is a movement command.
Inverse kinematics
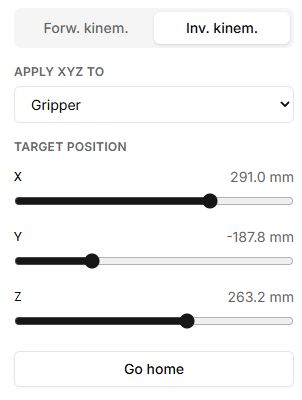
Open Inv. kinem. Choose a node in Apply XYZ to and change target X, Y and Z. The solver searches for joint values reaching that target. A failure message means it was not reached; reduce the change or return to a reachable pose.
Scene controls
Drag to orbit; right- or middle-button dragging pans; the wheel zooms. An orange target and movement hints appear in supported modes. Moving the camera alone does not command a joint angle.
Buttons, fields and results
The control panel appears after connecting. Start with Virtual to try the controls on the model without physical hardware.
| Control | How to use it and what happens |
|---|---|
| Connect robot | Opens the connection dialog. Choose a model and connection method. Once connected, the scene and control panel replace the initial instructions. |
| Forw. kinem. | Opens individual joint controls. Each slider changes the corresponding model joint and sends a command to the connected robot. Angles are shown in degrees; prismatic joint displacement is shown in millimetres. |
| Debounce | When enabled, a command for an individual motor is sent 200 ms after the last change to its slider. Moving that slider again restarts the timer. The model updates immediately. This checkbox applies to forward-kinematics sliders. |
| Go home | Sets joints to the neutral values in the selected model configuration. This is a movement command, not a stop command. In inverse kinematics it also updates the target point to match the neutral pose. |
| Node | Selects a joint or calculation node whose coordinates you want to determine. Selecting it causes no movement and clears the previous calculation result. |
| Compute position | Calculates X, Y and Z of the selected node from current joint values and displays millimetres. This is a one-time calculation: click again after changing the pose. These coordinates are not measurements from an external camera. |
| Inv. kinem. | Opens target-point controls instead of individual angles. A target marker appears in the scene. |
| Apply XYZ to | Selects the link that the solver should bring to the requested coordinates. Select the link first, then change X, Y or Z. |
| Target position: X, Y, Z | Move one slider by a small amount. Labels show millimetres. Solving starts automatically; there is no separate apply button. A successful solution updates the model joints and sends commands to connected motors. |
| Solving… | A calculation status indicator, not a button. Wait for the result before your next action. |
| No solution found | The solver did not find a solution for this target. The target marker does not prove that the robot reached it. Move the target closer to the last reachable position and try another small change. |
Try the controls with a virtual robot
- Connect using Virtual and open Forw. kinem. Change one joint: the corresponding part of the model should turn.
- Select a node and click Compute position. Note X, Y and Z; change a joint slightly and calculate again to see the new coordinates.
- Enable Debounce and move a slider. The model reacts immediately; the command waits until you pause.
- Click Go home. The model should return to its neutral pose.
- Open Inv. kinem., select the target link and change X slightly. Check the solution and model movement, then click Go home again.
If a connection prompt appears instead of the panel, check your connection. If inverse kinematics fails, start from the neutral pose and use a smaller displacement. Before using hardware, check the selected model and clear space around the arm.
Close-up views
Gripper buttons and the orange marker
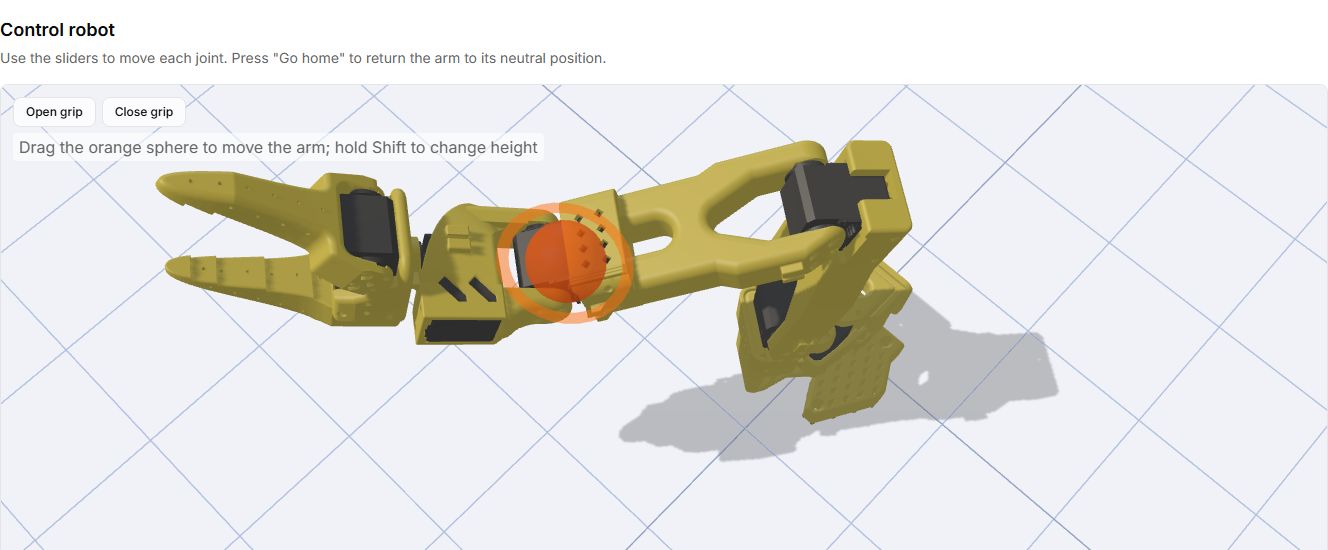
With a virtual connection, the forward-kinematics view provides Open gripper and Close gripper above the scene. Hold a button to move the gripper; releasing it or moving the pointer off the button stops that action. Drag the orange marker to set a target for the virtual arm; hold Shift while dragging to change height. The inverse-kinematics view uses the X, Y, Z panel and hides these buttons.