Calibrate joints
Result: offsets and limits are verified for each selected motor, and you know which recordings and models remain usable. Save backups first.
Decide whether recalibration is needed
- An existing verified arm with settings preserved by flashing: keep its calibration. Do not change offsets merely to reproduce an illustration.
- A new assembly or unknown calibration: complete both stages below.
- Offsets have changed: record poses again and check or update the gravity model and viewer mapping. Calibration does not update them automatically.
Naming a recorded pose home or reference does not calibrate a motor. Calibration separately writes encoder offsets and travel limits to the device.
Procedure requirements
The tool supports 1–6 motors with unique IDs 1–253, mechanically bounded travel, GD32 STS model family 9, position mode and position divisor 1. Close other serial programs. Support the arm whenever torque is off.
1. Choose a physical reference
Choose a pose you can reproduce manually with enough travel in both directions. It will read 2048 after calibration. The complete travel must fit within 0–4095: at most 2048 counts below the reference and 2047 above it.
For a new SO-101/SO-102 calibration, use the illustrations: upper arm upright, forearm and gripper forward, base and wrist roll centered between stops, gripper halfway open. Use physical travel rather than uncalibrated readings.
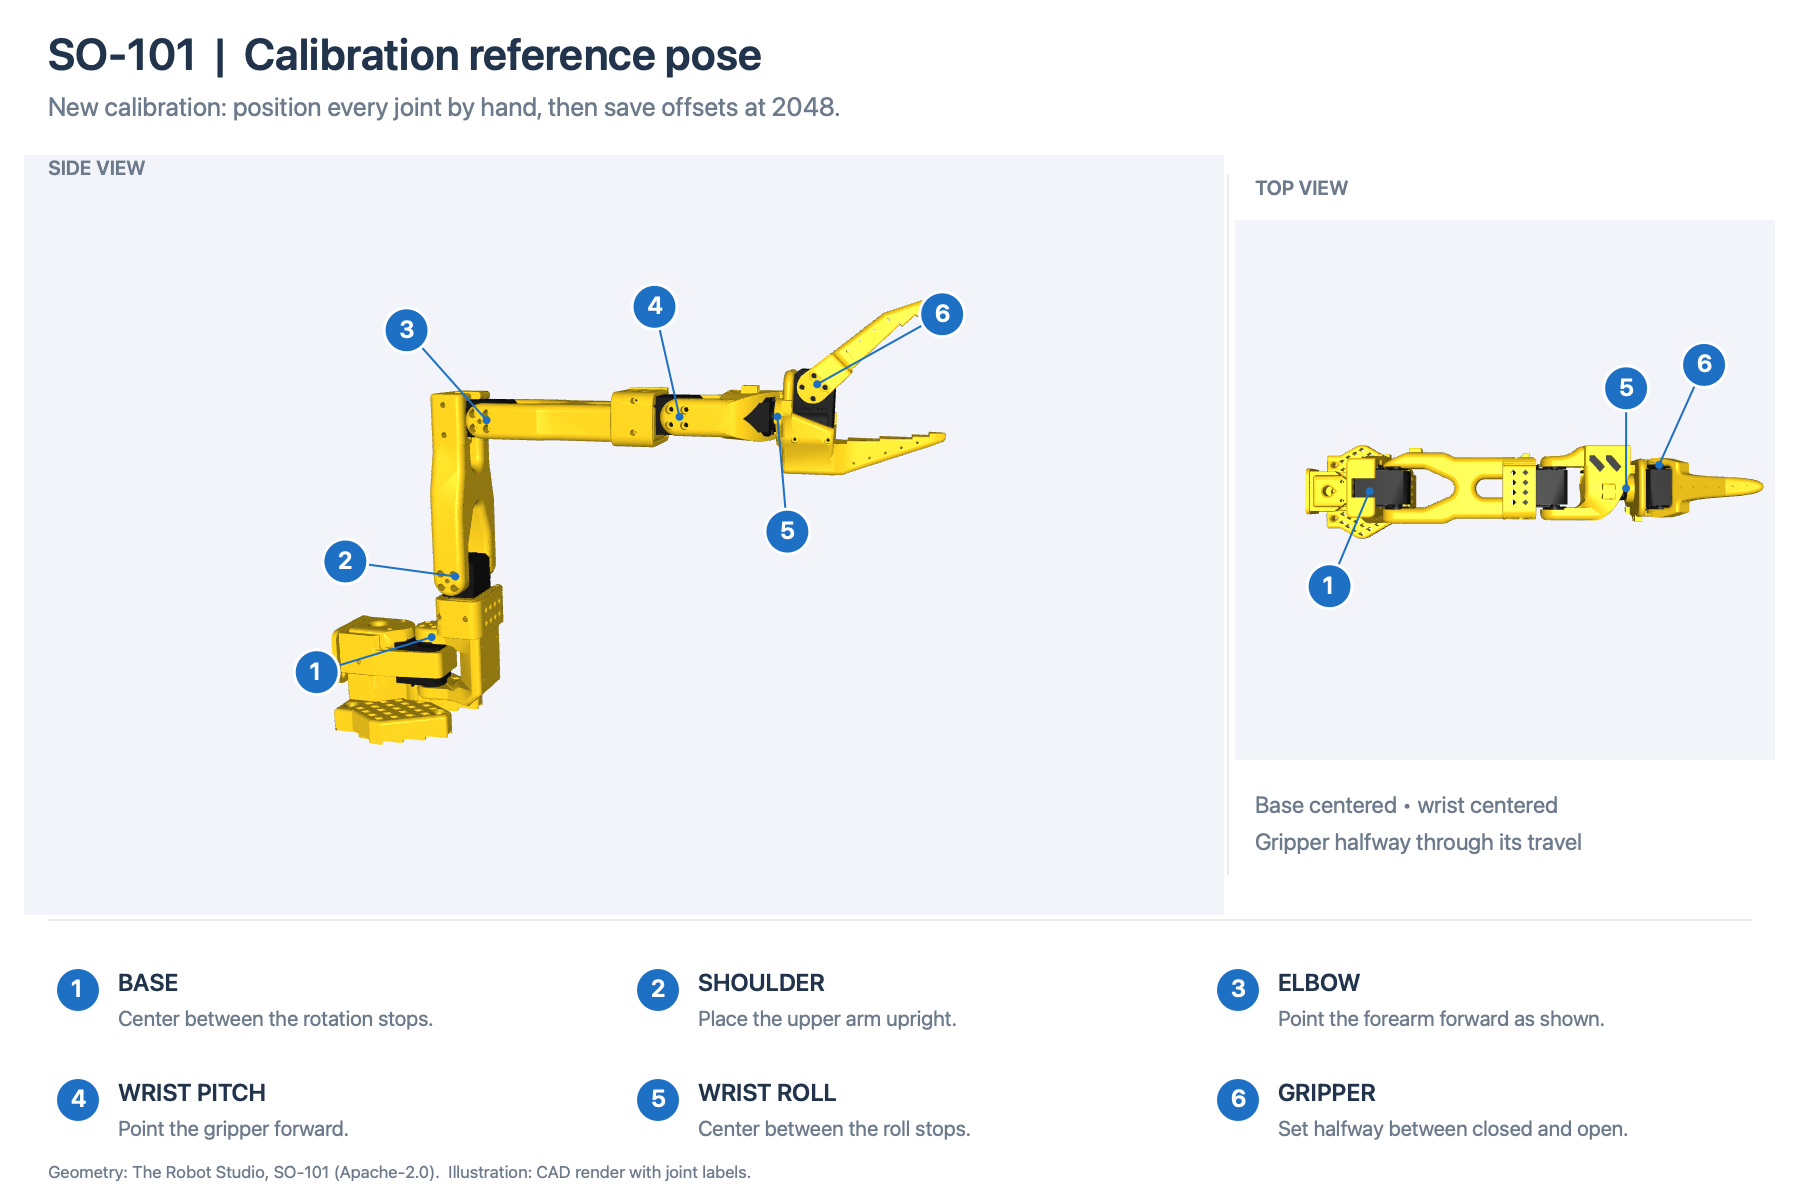
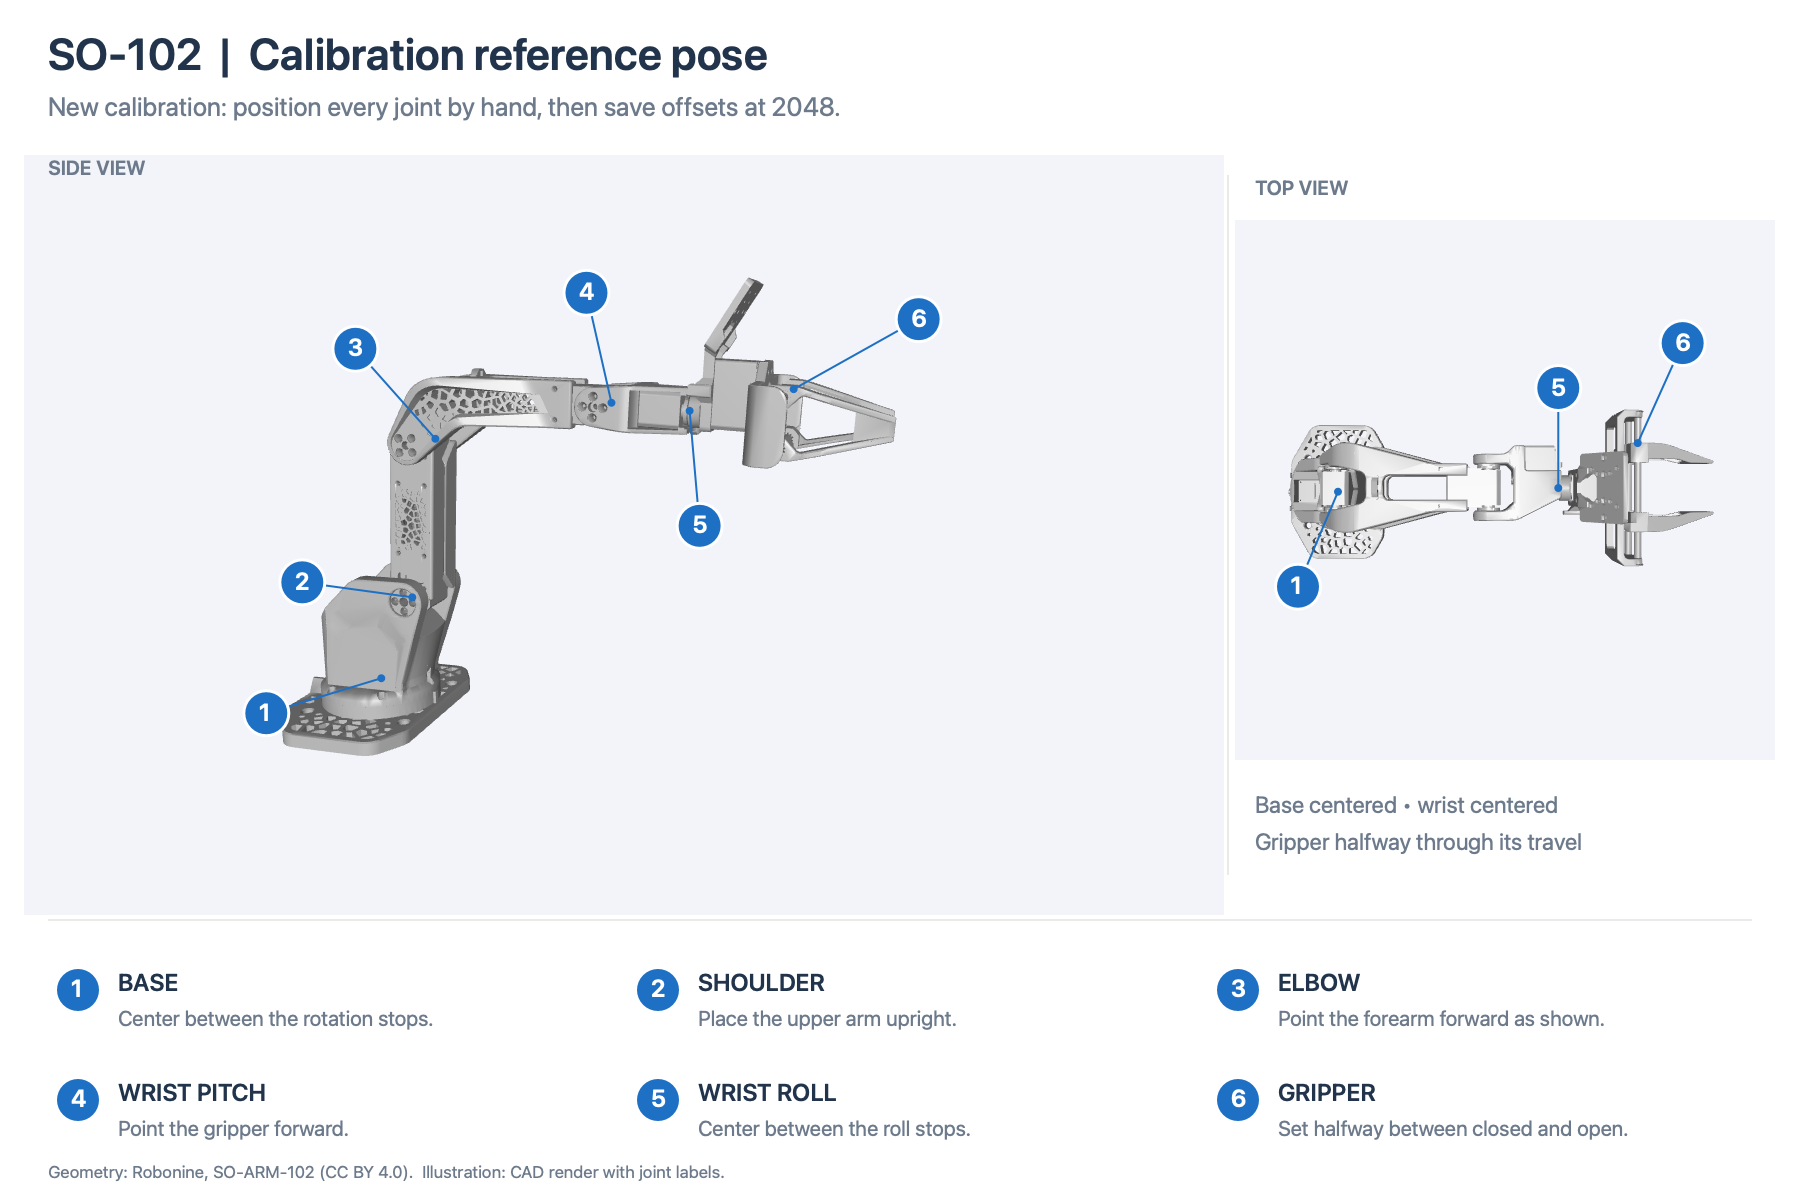
These images do not define a universal reference for a bundled gravity model or URDF. Count 2048 does not automatically mean 0°. The viewer has a separate count-to-angle mapping; gravity models have their own calibration binding.
2. Capture offsets and measure limits
This command changes saved settings but does not command motion. For the six-motor example:
macOS / Linux
npm run settings -- calibrate --port "$SERVO_PORT" --ids 1,2,3,4,5,6 --file tools/settings/calibrations/arm.local.json
Windows PowerShell
npm.cmd run settings -- calibrate --port "$env:SERVO_PORT" --ids 1,2,3,4,5,6 --file tools/settings/calibrations/arm.local.json
Replace the IDs if necessary. An explicit selection leaves other motors unchanged. Omitting --ids selects all discovered motors, up to six.
- If torque is enabled, confirm release only after supporting the mechanism.
- Place the arm in the reference pose, hold it still and press Enter. The tool saves and verifies the offset registers, then records the new position readings in the report.
- Move each joint manually through its full permitted travel, pausing at the ends. Do not force stops.
- Review the minimum, maximum and travel table, then press Enter. Saved limits leave 10 counts of clearance inward from each measured endpoint.
Middle is only the measured range midpoint. It does not replace the captured reference; asymmetric limits are valid. Each joint must travel at least 64 counts and less than a full turn before saving.
3. Check the result
The report tools/settings/calibrations/arm.local.json must show status: "verified". Only that status confirms both stages. This verifies saved settings, not that the arm stayed physically still: referenceReadbackCounts is informational and is not a separate pass/fail comparison with 2048. Review those readings while keeping the chosen reference pose. Torque remains off and settings writes are locked. Motor backups are retained in a unique directory under backups/ next to the report.
crosses zero means the travel does not fit between 0 and 4095: correct the physical reference. reset 2 clears only M2’s measured range for another sweep; it does not correct a bad reference. Cancelling stage two leaves the new offsets saved and the old limits in place until replaced. Finish calibration before movement.
Next: prepare the configuration and first movement.
Documentation home · Source revision: a995f77. Extension 9.0.